
Planning With Multiple Calendars
Split your meal plan into separate calendars, such as one per person, and choose which ones the planner shows.
By default, your family has one meal plan that everyone shares. Turn on multiple calendars when you want to plan meals separately, for example one calendar per person, and still see them together in the planner.
Setting Up Calendars
Every family starts with one calendar, called Household. It’s the default: meals you plan without picking a calendar go there.
Steps
-
Open Meal Plan Settings
- Go to your meal plan page
- Click the More Actions button (the three dots at the right of the toolbar)
- Select Meal Plan Settings
-
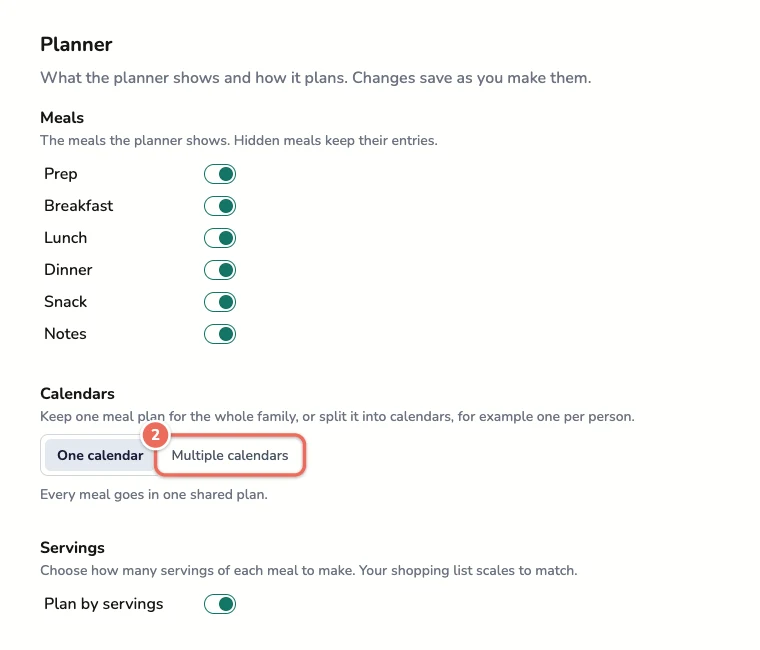
Turn On Multiple Calendars
- In the Meal Plans section, find Calendars
- Click Multiple calendars
- Add a Calendar
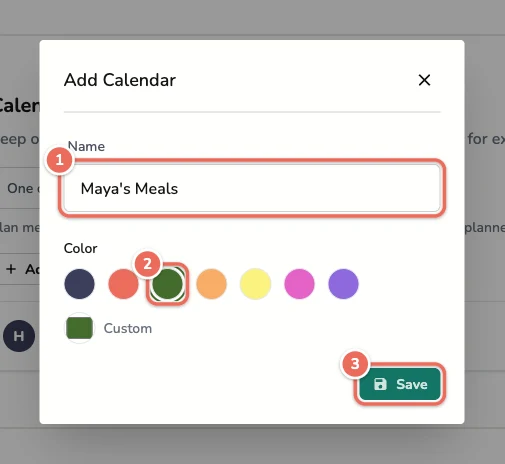
- Click Add Calendar
- Enter a Name
- Pick a color
- Click Save
The calendar options show up in the planner once you have a second calendar. To rename a calendar or change its color, click the pencil icon on its row.
Note: A family can have up to six calendars, including the default one.
Planning Meals in a Calendar
Once you have more than one calendar, you can pick a calendar when you add a meal:
- Add Recipe to Meal Plan: pick a Calendar before you click Add To Plan
- Auto-Generate Meal Plan and Apply a Meal Plan Template: pick the Calendar the new meals go in
If you don’t pick one, the meal goes in the default calendar. Meals you add right in the planner go in the calendar you’re viewing when the planner shows only one, and in the default calendar otherwise.
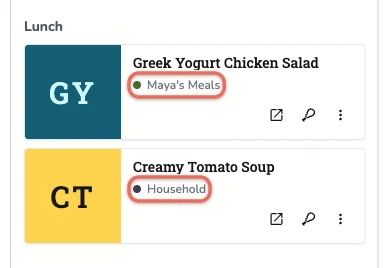
Each card in the planner shows its calendar’s name and color.
Moving a Meal to Another Calendar
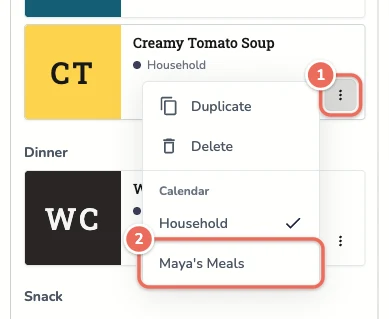
- Open the Card Menu
- Click the More actions button on the meal’s card
- Pick the Calendar
- Under Calendar, click the calendar you want
On a phone, you can also change the Calendar when you edit a meal.
Showing Only Some Calendars
Steps
- Open the Plan Menu
- Click Plan in the planner toolbar
- Choose Calendars
- Under Calendars, click a calendar to hide or show it
- The menu stays open, so you can change several at once
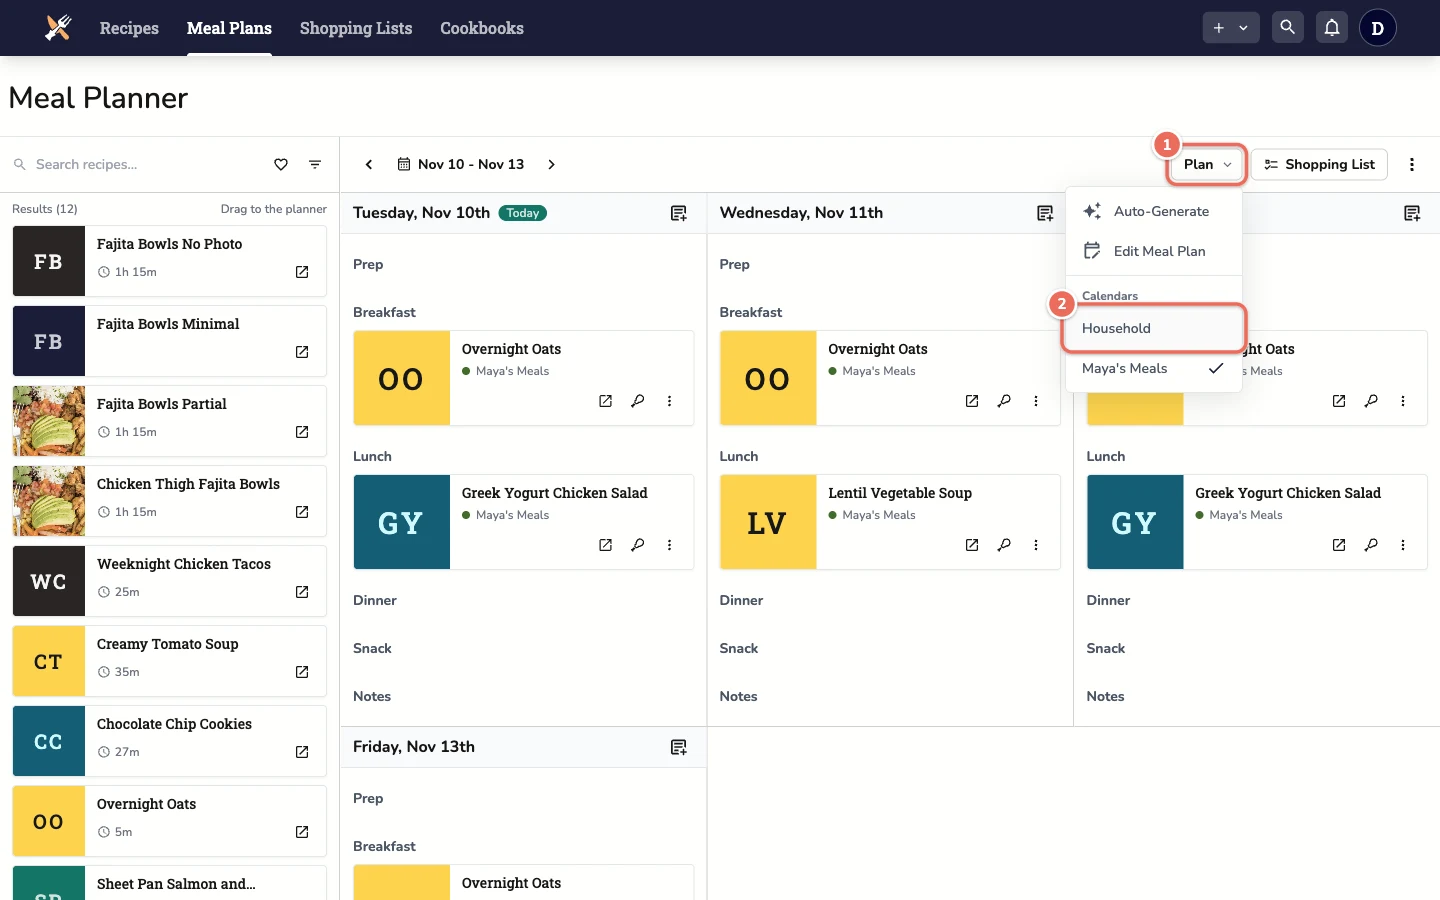
The planner always shows at least one calendar. Your choice stays in the page’s address, so reloading the page or sharing the link keeps it.
Edit Meal Plan in the same menu acts only on the calendars you’re showing. When some are hidden, the dialog names the calendars it changes.
Shopping Lists and Calendar Sync
When you have more than one calendar, both of these let you choose calendars:
- Sync Shopping List: check the Calendars whose meals go on the list
- Sync with Calendar (in More Actions): check the Calendars your calendar app should show. Every calendar is checked at first, and a link with every calendar checked also picks up calendars you add later.
Note: Clear existing items before syncing deletes every item on the list, including items from calendars you didn’t select.
Deleting a Calendar
Click the trash icon on the calendar’s row in Meal Plan Settings, then Delete Calendar. This deletes the meals planned in that calendar too.
To go back to one shared plan, click One calendar. Recipinned asks before it deletes the extra calendars and their meals. Meals in the default calendar stay.
Note: You can’t delete the default calendar.